YAO_SimpleDust查看:583 回复:4 评论:6 创建时间:2020-08-23T22:47:05
用户:YAO_SimpleDust查看:583 回复:4 评论:6 创建时间:2020-08-23T22:47:05
【作品展示】

【作品介绍】
3D我的世界,移动速度飞行速度设置时加"-"
【作品源代码】
#导入包
from __future__ import division
import sys
import math
import random
import time
from tkinter import *
import tkinter.messagebox
from collections import deque
from pyglet import image
from pyglet.gl import *
from pyglet.graphics import TextureGroup
from pyglet.window import key, mouse
#隐藏TK
root = Tk()
root.withdraw()
#设置
print("设置")
temp = input("视距:")
视距 = int(temp)
temp = input("步行速度:")
步行速度 = int(temp)
temp = input("飞行速度:")
飞行速度 = int(temp)
#弹出提示
tkinter.messagebox.showinfo(title='minecraft', message='W:前 S:后 A:左 D:右 鼠标:环顾四周 空格:跳跃 ')
TICKS_PER_SEC = 60
# 参数.W
SECTOR_SIZE = 视距
WALKING_SPEED = 步行速度
FLYING_SPEED = 飞行速度
GRAVITY = 20.0 #重力
MAX_JUMP_HEIGHT = 1.0 # 跳跃高度.
# 要导出用于计算跳跃速度的公式,请先求解
# v_t = v_0 + a * t
# 在达到最大高度时的时间,其中a是加速度
# 由于重力和 v_t = 0. 这给:
# t = - v_0 / a
# 使用t和所需 MAX_JUMP_HEIGHT 解决 v_0 (跳跃速度) in
# s = s_0 + v_0 * t + (a * t^2) / 2
JUMP_SPEED = math.sqrt(2 * GRAVITY * MAX_JUMP_HEIGHT) #跳跃速度
TERMINAL_VELOCITY = 50 #终端速度(?)
PLAYER_HEIGHT = 2 #玩家身高
if sys.version_info[0] >= 3:
xrange = range
def cube_vertices(x, y, z, n):
""" 返回大小为2 * n的多维数据集在位置x,y,z处的顶点.
"""
return [
x-n,y+n,z-n, x-n,y+n,z+n, x+n,y+n,z+n, x+n,y+n,z-n, # 顶
x-n,y-n,z-n, x+n,y-n,z-n, x+n,y-n,z+n, x-n,y-n,z+n, # 底
x-n,y-n,z-n, x-n,y-n,z+n, x-n,y+n,z+n, x-n,y+n,z-n, # 左
x+n,y-n,z+n, x+n,y-n,z-n, x+n,y+n,z-n, x+n,y+n,z+n, # 右
x-n,y-n,z+n, x+n,y-n,z+n, x+n,y+n,z+n, x-n,y+n,z+n, # 前
x+n,y-n,z-n, x-n,y-n,z-n, x-n,y+n,z-n, x+n,y+n,z-n, # 后
]
def tex_coord(x, y, n=4):
""" 返回纹理正方形的边界顶点.
"""
m = 1.0 / n
dx = x * m
dy = y * m
return dx, dy, dx + m, dy, dx + m, dy + m, dx, dy + m
def tex_coords(top, bottom, side):
""" 返回顶部,底部和侧面的纹理方块列表.
"""
top = tex_coord(*top)
bottom = tex_coord(*bottom)
side = tex_coord(*side)
result = []
result.extend(top)
result.extend(bottom)
result.extend(side * 4)
return result
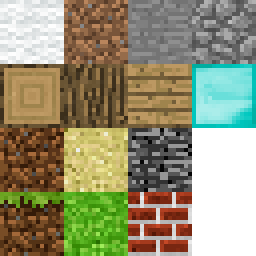
TEXTURE_PATH = '材质.png'
喵方块 = tex_coords((1, 0), (0, 1), (0, 0))
沙子 = tex_coords((1, 1), (1, 1), (1, 1))
红砖 = tex_coords((2, 0), (2, 0), (2, 0))
基岩 = tex_coords((2, 1), (2, 1), (2, 1))
木板 = tex_coords((2, 2), (2, 2), (2, 2))
原木 = tex_coords((0, 2), (0, 2), (1, 2))
羊毛 = tex_coords((0, 3), (0, 3), (0, 3))
泥土 = tex_coords((0, 1), (0, 1), (0, 1))
石头 = tex_coords((2, 3), (2, 3), (2, 3))
圆石 = tex_coords((3, 3), (3, 3), (3, 3))
钻石 = tex_coords((3, 2), (3, 2), (3, 2))
FACES = [
( 0, 1, 0),
( 0,-1, 0),
(-1, 0, 0),
( 1, 0, 0),
( 0, 0, 1),
( 0, 0,-1),
]
def normalize(position):
""" 接受任意精度的“位置”并返回块
包含那个位置.
参量
----------
位置:三元组
退货
-------
block_position:len 3的整数元组
"""
x, y, z = position
x, y, z = (int(round(x)), int(round(y)), int(round(z)))
return (x, y, z)
def sectorize(position):
""" 返回表示给定位置的扇区的元组.
参量
----------
位置:三元组
退货
-------
行业:len 3元组
"""
x, y, z = normalize(position)
x, y, z = x // SECTOR_SIZE, y // SECTOR_SIZE, z // SECTOR_SIZE
return (x, 0, z)
class Model(object):
def __init__(self):
# 批处理是用于批处理渲染的顶点列表的集合.
self.batch = pyglet.graphics.Batch()
# TextureGroup管理OpenGL纹理.
self.group = TextureGroup(image.load(TEXTURE_PATH).get_texture())
# 从位置到该位置的块纹理的映射.
# 这定义了当前世界上所有的块.
self.world = {}
# 与`world`相同的映射,但是只包含显示的块.
self.shown = {}
# 所有显示块的从位置到pyglet`VertextList`的映射.
self._shown = {}
# 从部门映射到该部门内的职位列表.
self.sectors = {}
# 简单的功能队列实现。队列中填充
# _show_block() and _hide_block() calls
self.queue = deque()
self._initialize()
def _initialize(self):
""" 通过放置所有块来初始化世界.
"""
n = 80 # 1/2 世界的宽度和高度
s = 1 # 一步的大小
y = 0 # 初始y高度
for x in xrange(-n, n + 1, s):
for z in xrange(-n, n + 1, s):
# 铺一层基岩和喵方块.
self.add_block((x, y - 2, z), 喵方块, immediate=False)
self.add_block((x, y - 3, z), 泥土, immediate=False)
self.add_block((x, y - 4, z), 泥土, immediate=False)
self.add_block((x, y - 5, z), 泥土, immediate=False)
self.add_block((x, y - 6, z), 基岩, immediate=False)
if x in (-n, n) or z in (-n, n):
# 创建基岩墙.
for dy in xrange(-6, 4):
self.add_block((x, y + dy, z), 基岩, immediate=False)
# 随机产生小山
o = n - 10
for _ in xrange(120):
a = random.randint(-o, o) # x 山的位置
b = random.randint(-o, o) # z 山的位置
c = -1 # 小山的地基
h = random.randint(1, 6) # 山的高度
s = random.randint(4, 8) # 2 * s 是山的边长
d = 1 # 多快变山坡
t = random.choice([喵方块])
for y in xrange(c, c + h):
for x in xrange(a - s, a + s + 1):
for z in xrange(b - s, b + s + 1):
if (x - a) ** 2 + (z - b) ** 2 > (s + 1) ** 2:
continue
if (x - 0) ** 2 + (z - 0) ** 2 < 5 ** 2:
continue
self.add_block((x, y, z), t, immediate=False)
s -= d # 减少边长,使山逐渐变细
def hit_test(self, position, vector, max_distance=8):
""" 从当前位置进行视线搜索。如果是
相交后将其返回,以及该行中先前的块
视线。如果未找到任何块,则返回None,None.
参量
----------
位置:三元组
从(x,y,z)位置检查可见性。
矢量:伦3元组
视线矢量。
max_distance:int
距离搜索结果有几个街区。
"""
m = 8
x, y, z = position
dx, dy, dz = vector
previous = None
for _ in xrange(max_distance * m):
key = normalize((x, y, z))
if key != previous and key in self.world:
return key, previous
previous = key
x, y, z = x + dx / m, y + dy / m, z + dz / m
return None, None
def exposed(self, position):
""" 如果给定``position''在所有6个侧面都被包围,则返回False
块,否则为True。
"""
x, y, z = position
for dx, dy, dz in FACES:
if (x + dx, y + dy, z + dz) not in self.world:
return True
return False
def add_block(self, position, texture, immediate=True):
""" 向世界添加具有给定的“纹理”和“位置”的块.
参量
----------
位置:三元组
要添加的块的(x,y,z)位置。
纹理:len 3的列表
纹理方块的坐标。使用`tex_coords()`
生成。
立即:布尔
是否立即绘制块。
"""
if position in self.world:
self.remove_block(position, immediate)
self.world[position] = texture
self.sectors.setdefault(sectorize(position), []).append(position)
if immediate:
if self.exposed(position):
self.show_block(position)
self.check_neighbors(position)
def remove_block(self, position, immediate=True):
""" 移除指定位置的方块.
参量
----------
位置:三元组
要删除的块的(x,y,z)位置。
立即:布尔
是否立即从画布上删除块。
"""
del self.world[position]
self.sectors[sectorize(position)].remove(position)
if immediate:
if position in self.shown:
self.hide_block(position)
self.check_neighbors(position)
def check_neighbors(self, position):
""" 检查“ position”周围的所有方块并确保其可见
状态是当前的。这意味着隐藏未喵的块,并且
确保显示所有喵的块。通常在块后使用
添加或删除.
"""
x, y, z = position
for dx, dy, dz in FACES:
key = (x + dx, y + dy, z + dz)
if key not in self.world:
continue
if self.exposed(key):
if key not in self.shown:
self.show_block(key)
else:
if key in self.shown:
self.hide_block(key)
def show_block(self, position, immediate=True):
""" 在给定的位置显示块。此方法假定
块已经用add_block()添加了
参量
----------
位置:三元组
要显示的块的(x,y,z)位置。
立即:布尔
是否立即显示区块.
"""
texture = self.world[position]
self.shown[position] = texture
if immediate:
self._show_block(position, texture)
else:
self._enqueue(self._show_block, position, texture)
def _show_block(self, position, texture):
""" show_block()方法的私有实现。
参量
----------
位置:三元组
要显示的块的(x,y,z)位置。
纹理:len 3的列表
纹理方块的坐标。使用`tex_coords()`
生成。
"""
x, y, z = position
vertex_data = cube_vertices(x, y, z, 0.5)
texture_data = list(texture)
# create vertex list
# FIXME Maybe `add_indexed()` should be used instead
self._shown[position] = self.batch.add(24, GL_QUADS, self.group,
('v3f/static', vertex_data),
('t2f/static', texture_data))
def hide_block(self, position, immediate=True):
""" 将块隐藏在给定的位置。隐藏不会删除
与世界隔绝。
参量
----------
位置:三元组
要隐藏的块的(x,y,z)位置。
立即:布尔
是否立即从画布上删除该块。
"""
self.shown.pop(position)
if immediate:
self._hide_block(position)
else:
self._enqueue(self._hide_block, position)
def _hide_block(self, position):
""" 'hide_block()`方法的私有实现.
"""
self._shown.pop(position).delete()
def show_sector(self, sector):
""" 确保应显示给定扇区中的所有块
画到画布上.
"""
for position in self.sectors.get(sector, []):
if position not in self.shown and self.exposed(position):
self.show_block(position, False)
def hide_sector(self, sector):
""" 确保给定扇区中应隐藏的所有块
从画布上删除.
"""
for position in self.sectors.get(sector, []):
if position in self.shown:
self.hide_block(position, False)
def change_sectors(self, before, after):
""" 从之前的扇区移动到之后的扇区。一个部门是一个
世界的连续x,y子区域。部门用于加速
世界渲染.
"""
before_set = set()
after_set = set()
pad = 4
for dx in xrange(-pad, pad + 1):
for dy in [0]: # xrange(-pad, pad + 1):
for dz in xrange(-pad, pad + 1):
if dx ** 2 + dy ** 2 + dz ** 2 > (pad + 1) ** 2:
continue
if before:
x, y, z = before
before_set.add((x + dx, y + dy, z + dz))
if after:
x, y, z = after
after_set.add((x + dx, y + dy, z + dz))
show = after_set - before_set
hide = before_set - after_set
for sector in show:
self.show_sector(sector)
for sector in hide:
self.hide_sector(sector)
def _enqueue(self, func, *args):
""" 将`func`添加到内部队列.
"""
self.queue.append((func, args))
def _dequeue(self):
""" 从内部队列中弹出顶部函数并调用它.
"""
func, args = self.queue.popleft()
func(*args)
def process_queue(self):
""" 定期休息时处理整个队列。这允许
游戏循环运行平稳。队列包含对
_show_block()和_hide_block(),因此,如果
add_block()或remove_block()的调用方式为Instant = False
"""
start = time.process_time()
while self.queue and time.process_time() - start < 1.0 / TICKS_PER_SEC:
self._dequeue()
def process_entire_queue(self):
""" 不间断地处理整个队列.
"""
while self.queue:
self._dequeue()
class Window(pyglet.window.Window):
def __init__(self, *args, **kwargs):
super(Window, self).__init__(*args, **kwargs)
# 窗口是否专门捕获鼠标.
self.exclusive = False
# 当飞行重力无效且速度增加时.
self.flying = False
# 跨步运动朝着您所面对的方向横向移动,
# 例如向左或向右移动,同时继续面向前方.
#
# 向前移动时,第一个元素为-1,向后移动时为1,而0
# 除此以外。向左移动第二个元素为-1,向左移动第二个元素
# 对,否则为0.
self.strafe = [0, 0]
# 世界上当前的(x,y,z)位置,以浮点数指定。注意
# 也许与数学课不同,y轴是垂直轴.
self.position = (0, 0, 0)
# 第一个元素是播放器在x-z平面(地面
# 平面)从z轴向下测量。第二个是旋转
#从地平面向上的角度。旋转度数。
#
#垂直平面旋转的范围是-90(向下看)到
#90(直望)。水平旋转范围是喵的。
self.rotation = (0, 0)
# 玩家当前所在的部门.
self.sector = None
# 屏幕中心的十字线.
self.reticle = None
# y(向上)方向的速度.
self.dy = 0
# 玩家可以放置的方块列表。按数字键循环.
self.inventory = [喵方块, 泥土, 圆石, 石头, 沙子, 木板, 原木, 红砖, 羊毛, 钻石]
# 用户可以放置的当前块。按数字键循环.
self.block = self.inventory[0]
# 便捷的num键列表.
self.num_keys = [
key._1, key._2, key._3, key._4, key._5,
key._6, key._7, key._8, key._9, key._0]
# 处理世界的模型实例.
self.model = Model()
# 显示在画布左上方的标签.
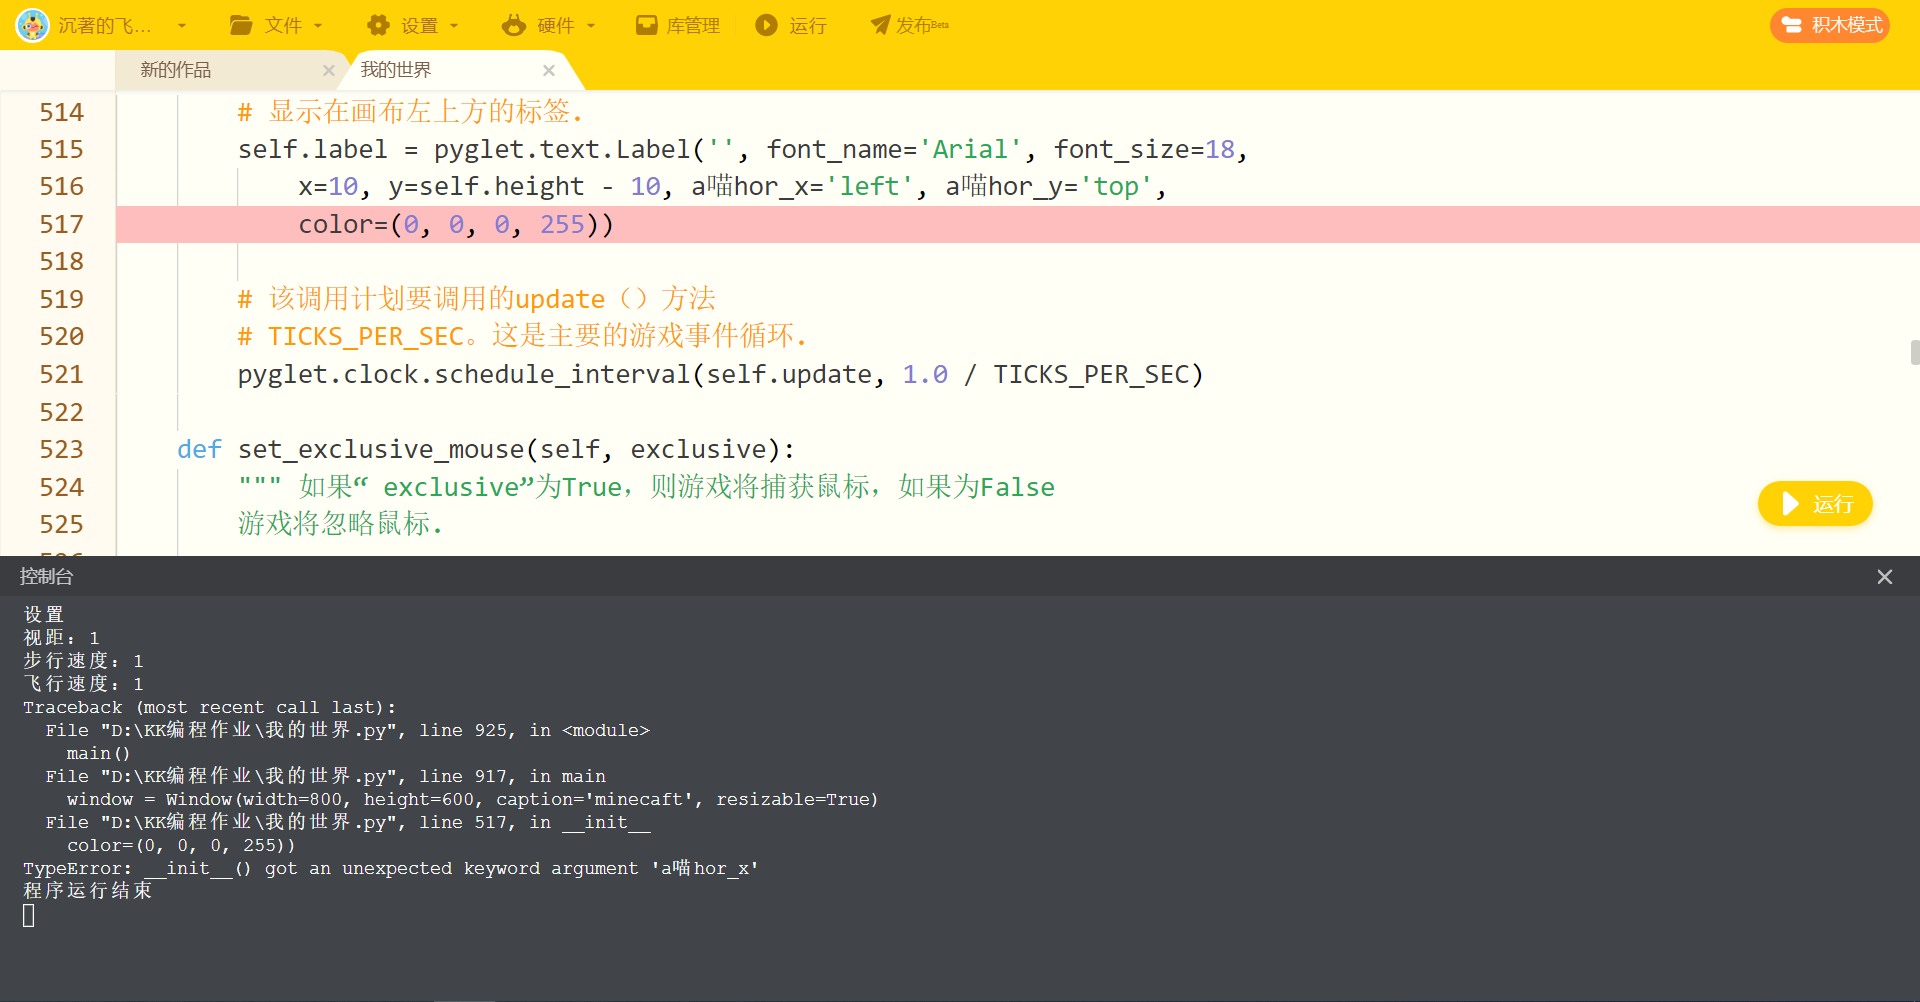
self.label = pyglet.text.Label('', font_name='Arial', font_size=18,
x=10, y=self.height - 10, anchor_x='left', anchor_y='top',
color=(0, 0, 0, 255))
# 该调用计划要调用的update()方法
# TICKS_PER_SEC。这是主要的游戏事件循环.
pyglet.clock.schedule_interval(self.update, 1.0 / TICKS_PER_SEC)
def set_exclusive_mouse(self, exclusive):
""" 如果“ exclusive”为True,则游戏将捕获鼠标,如果为False
游戏将忽略鼠标.
"""
super(Window, self).set_exclusive_mouse(exclusive)
self.exclusive = exclusive
def get_sight_vector(self):
""" 返回指示方向的当前视线矢量
玩家正在寻找.
"""
x, y = self.rotation
# y的范围是-90到90,或-pi / 2到pi / 2,因此m的范围是0到1以及
# 平行于地面向前看时为1,向地面看时为0
# 直线上升或下降.
m = math.cos(math.radians(y))
# dy的范围是-1到1,直下看时是-1,当dy时是1
# 直望.
dy = math.sin(math.radians(y))
dx = math.cos(math.radians(x - 90)) * m
dz = math.sin(math.radians(x - 90)) * m
return (dx, dy, dz)
def get_motion_vector(self):
""" 返回当前运动矢量,指示运动的速度
播放器.
退货
-------
矢量:伦3元组
元组分别包含x,y和z的速度.
"""
if any(self.strafe):
x, y = self.rotation
strafe = math.degrees(math.atan2(*self.strafe))
y_angle = math.radians(y)
x_angle = math.radians(x + strafe)
if self.flying:
m = math.cos(y_angle)
dy = math.sin(y_angle)
if self.strafe[1]:
# 向左或向右移动.
dy = 0.0
m = 1
if self.strafe[0] > 0:
# 向后移动.
dy *= -1
# 当您向上或向下飞行时,左和右的数量较少
# 运动.
dx = math.cos(x_angle) * m
dz = math.sin(x_angle) * m
else:
dy = 0.0
dx = math.cos(x_angle)
dz = math.sin(x_angle)
else:
dy = 0.0
dx = 0.0
dz = 0.0
return (dx, dy, dz)
def update(self, dt):
""" 安排此方法由pyglet重复调用
时钟.
参量
----------
dt:浮动
自上次通话以来的时间变化.
"""
self.model.process_queue()
sector = sectorize(self.position)
if sector != self.sector:
self.model.change_sectors(self.sector, sector)
if self.sector is None:
self.model.process_entire_queue()
self.sector = sector
m = 8
dt = min(dt, 0.2)
for _ in xrange(m):
self._update(dt / m)
def _update(self, dt):
""" 私有实现`update()`方法。这是最
的运动逻辑以及重力和碰撞检测的生命。
参量
----------
dt:浮动
自上次通话以来的时间变化。
"""
# 步行
speed = FLYING_SPEED if self.flying else WALKING_SPEED
d = dt * speed # 距离覆盖此刻度.
dx, dy, dz = self.get_motion_vector()
# 在考虑重力之前在空间中的新位置.
dx, dy, dz = dx * d, dy * d, dz * d
# 重力
if not self.flying:
# 更新垂直速度:如果您跌倒,请加快速度直到
# 命中终端速度;如果您在跳跃,请减速直到
# 开始下降.
self.dy -= dt * GRAVITY
self.dy = max(self.dy, -TERMINAL_VELOCITY)
dy += self.dy * dt
# 碰撞
x, y, z = self.position
x, y, z = self.collide((x + dx, y + dy, z + dz), PLAYER_HEIGHT)
self.position = (x, y, z)
def collide(self, position, height):
""" 检查玩家是否处于指定的“位置”和“高度”
正在与世界上的任何街区碰撞。
参量
----------
位置:三元组
(x,y,z)位置检查碰撞。
高度:整数或浮点数
播放器的高度。
退货
-------
位置:三元组
考虑到碰撞的玩家的新位置。
"""
# 您需要与周围块的尺寸重叠多少
# 必须算作一次碰撞。如果为0,则将地形全部视为
# 碰撞。如果为.49,则您会沉入地下,就像走过
# 高喵。如果> = .5,您将跌倒 .
pad = 0.25
p = list(position)
np = normalize(position)
for face in FACES: # 检查所有周围的方块
for i in xrange(3): # 独立检查每个尺寸
if not face[i]:
continue
# 您在此维度上有多少重叠.
d = (p[i] - np[i]) * face[i]
if d < pad:
continue
for dy in xrange(height): # 检查每个高度
op = list(np)
op[1] -= dy
op[i] += face[i]
if tuple(op) not in self.model.world:
continue
p[i] -= (d - pad) * face[i]
if face == (0, -1, 0) or face == (0, 1, 0):
# 您正在与地面或天花板发生碰撞,因此请停止
# 下降/上升.
self.dy = 0
break
return tuple(p)
def on_mouse_press(self, x, y, button, modifiers):
""" 按下鼠标按钮时调用。有关按钮,请参见pyglet文档
amd(?以及)修饰符映射
参量
----------
x,y:整数
鼠标单击的坐标。如果出现以下情况,请始终位于屏幕中央
鼠标被捕获。
按钮:int
表示单击的鼠标按钮的数字。 1 =左键,
4 =右键。
修饰符:int
代表当
单击鼠标按钮。
"""
if self.exclusive:
vector = self.get_sight_vector()
block, previous = self.model.hit_test(self.position, vector)
if (button == mouse.RIGHT) or \
((button == mouse.LEFT) and (modifiers & key.MOD_CTRL)):
# 在OSX上,按Control +左键单击=右键单击.
if previous:
self.model.add_block(previous, self.block)
elif button == pyglet.window.mouse.LEFT and block:
texture = self.model.world[block]
if texture != 基岩:
self.model.remove_block(block)
else:
self.set_exclusive_mouse(True)
def on_mouse_motion(self, x, y, dx, dy):
""" 在玩家移动鼠标时调用。
参量
----------
x,y:整数
鼠标单击的坐标。如果出现以下情况,请始终位于屏幕中央
鼠标被捕获。
dx,dy:浮动
鼠标的运动。
"""
if self.exclusive:
m = 0.15
x, y = self.rotation
x, y = x + dx * m, y + dy * m
y = max(-90, min(90, y))
self.rotation = (x, y)
def on_key_press(self, symbol, modifiers):
""" 玩家按下某个键时调用。请参阅pyglet文档以获取密钥
映射。
参量
----------
符号:整数
代表所按下键的数字。
修饰符:int
表示按下的所有修改键的数字。
"""
if symbol == key.W:
self.strafe[0] -= 1
elif symbol == key.S:
self.strafe[0] += 1
elif symbol == key.A:
self.strafe[1] -= 1
elif symbol == key.D:
self.strafe[1] += 1
elif symbol == key.SPACE:
if self.dy == 0:
self.dy = JUMP_SPEED
elif symbol == key.ESCAPE:
self.set_exclusive_mouse(False)
elif symbol == key.TAB:
self.flying = not self.flying
elif symbol in self.num_keys:
index = (symbol - self.num_keys[0]) % len(self.inventory)
self.block = self.inventory[index]
def on_key_release(self, symbol, modifiers):
""" 播放器释放键时调用。请参阅pyglet文档以获取密钥
映射。
参量
----------
符号:整数
代表所按下键的数字。
修饰符:int
表示按下的所有修改键的数字。
"""
if symbol == key.W:
self.strafe[0] += 1
elif symbol == key.S:
self.strafe[0] -= 1
elif symbol == key.A:
self.strafe[1] += 1
elif symbol == key.D:
self.strafe[1] -= 1
def on_resize(self, width, height):
""" 当窗口调整为新的“宽度”和“高度”时调用。
"""
# 标签
self.label.y = height - 10
# 标线
if self.reticle:
self.reticle.delete()
x, y = self.width // 2, self.height // 2
n = 10
self.reticle = pyglet.graphics.vertex_list(4,
('v2i', (x - n, y, x + n, y, x, y - n, x, y + n))
)
def set_2d(self):
""" 配置OpenGL绘制2D.
"""
width, height = self.get_size()
glDisable(GL_DEPTH_TEST)
viewport = self.get_viewport_size()
glViewport(0, 0, max(1, viewport[0]), max(1, viewport[1]))
glMatrixMode(GL_PROJECTION)
glLoadIdentity()
glOrtho(0, max(1, width), 0, max(1, height), -1, 1)
glMatrixMode(GL_MODELVIEW)
glLoadIdentity()
def set_3d(self):
""" 配置OpenGL以绘制3D.
"""
width, height = self.get_size()
glEnable(GL_DEPTH_TEST)
viewport = self.get_viewport_size()
glViewport(0, 0, max(1, viewport[0]), max(1, viewport[1]))
glMatrixMode(GL_PROJECTION)
glLoadIdentity()
gluPerspective(65.0, width / float(height), 0.1, 60.0)
glMatrixMode(GL_MODELVIEW)
glLoadIdentity()
x, y = self.rotation
glRotatef(x, 0, 1, 0)
glRotatef(-y, math.cos(math.radians(x)), 0, math.sin(math.radians(x)))
x, y, z = self.position
glTranslatef(-x, -y, -z)
def on_draw(self):
""" pyglet调用以绘制画布.
"""
self.clear()
self.set_3d()
glColor3d(1, 1, 1)
self.model.batch.draw()
self.draw_focused_block()
self.set_2d()
self.draw_label()
self.draw_reticle()
def draw_focused_block(self):
""" 在当前下方的块周围绘制黑色边缘
十字准线.
"""
vector = self.get_sight_vector()
block = self.model.hit_test(self.position, vector)[0]
if block:
x, y, z = block
vertex_data = cube_vertices(x, y, z, 0.51)
glColor3d(0, 0, 0)
glPolygonMode(GL_FRONT_AND_BACK, GL_LINE)
pyglet.graphics.draw(24, GL_QUADS, ('v3f/static', vertex_data))
glPolygonMode(GL_FRONT_AND_BACK, GL_FILL)
def draw_label(self):
""" 在屏幕的左上方绘制标签.
"""
x, y, z = self.position
self.label.text = '%02d (%.2f, %.2f, %.2f) %d / %d' % (
pyglet.clock.get_fps(), x, y, z,
len(self.model._shown), len(self.model.world))
self.label.draw()
def draw_reticle(self):
""" 在屏幕中央绘制十字准线.
"""
glColor3d(0, 0, 0)
self.reticle.draw(GL_LINES)
def setup_fog():
""" 配置OpenGL雾属性.
"""
# 启用雾。雾”将每个栅格化像素片段的
# 后纹理颜色."
glEnable(GL_FOG)
# 设置雾色.
glFogfv(GL_FOG_COLOR, (GLfloat * 4)(0.5, 0.69, 1.0, 1))
# 说我们在渲染速度和质量之间没有偏好.
glHint(GL_FOG_HINT, GL_DONT_CARE)
# 指定用于计算混合因子的方程式.
glFogi(GL_FOG_MODE, GL_LINEAR)
# 雾的开始和结束距离有多远。起点和终点越近,
# 雾范围内的雾越浓.
glFogf(GL_FOG_START, 20.0)
glFogf(GL_FOG_END, 60.0)
def setup():
""" 基本的OpenGL配置.
"""
# 在rgba中设置“清除”的颜色,即天空.
glClearColor(0.5, 0.69, 1.0, 1)
# 启用背面刻面的剔除(不渲染)-不是的刻面
# 对您可见.
glEnable(GL_CULL_FACE)
# 将纹理缩小/放大功能设置为GL_NEAREST(曼哈顿最近的距离)以指定的纹理坐标。 GL_NEAREST
# “通常比GL_LINEAR快,但由于纹喵素之间的过渡不那么平滑,因此可以生成边缘更清晰的纹理图像。”
glTexParameteri(GL_TEXTURE_2D, GL_TEXTURE_MIN_FILTER, GL_NEAREST)
glTexParameteri(GL_TEXTURE_2D, GL_TEXTURE_MAG_FILTER, GL_NEAREST)
setup_fog()
def main():
window = Window(width=800, height=600, caption='minecaft', resizable=True)
# 隐藏鼠标光标并防止鼠标离开窗口.
window.set_exclusive_mouse(True)
setup()
pyglet.app.run()
if __name__ == '__main__':
main()
【提示】
部分含有Python第三方库相关内容的作品,在海龟编辑器网页端无法运行哦!如遇到这种情况,可以打开下面的链接,下载海龟编辑器客户端:
https://python.codemao.cn